Uploading Images
As a Drupal editor, you can upload images to display on webpages.
Contact the Web Team at group-lib-webteam@ncsu.edu if you have questions about uploading media to Drupal.
How to upload a photo to Drupal
- Ensure your photo is websized (a reasonable file size for our users' computers to download when viewing on our website). We allow up to 2MB filesizes for images on our website, so you may need to resize your image in Photoshop before uploading.
- Log into Drupal
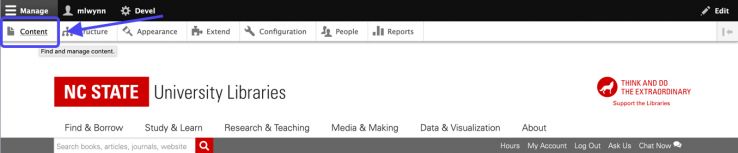
- Select Content from the administration toolbar at the top of the screen.
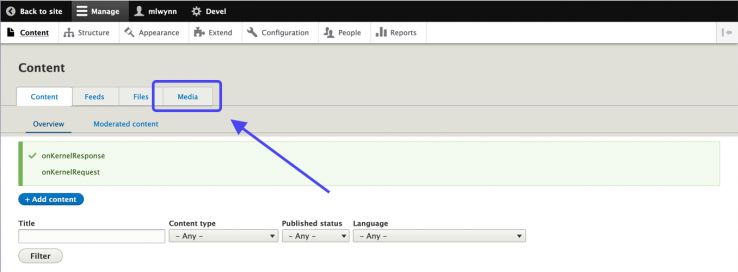
Here's a caption - Select the Media tab.
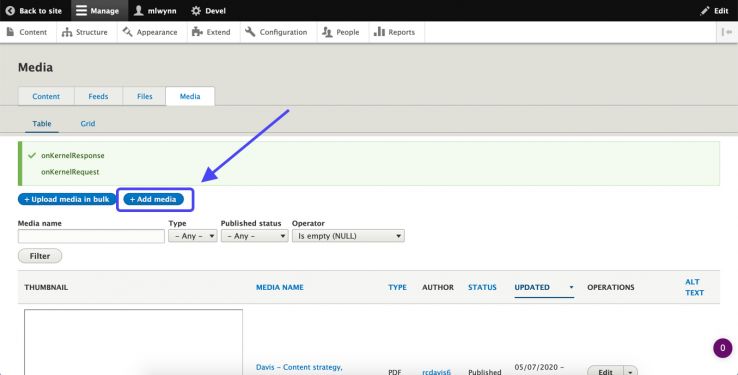
- Select the Add Media button.
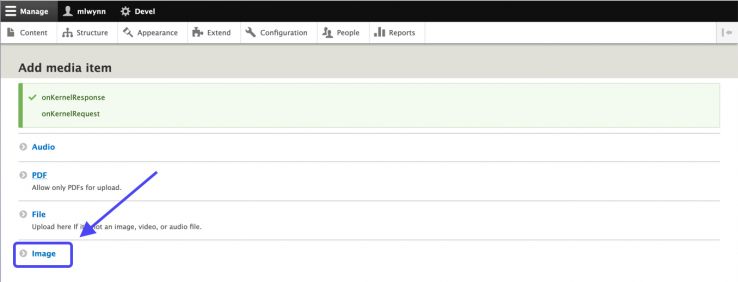
- Select the Image option.
- Fill out a human-readable name for your image, upload your image file, add alt text, and (for 360 degree images) hotspot data.

- Don't forget to select the blue Save button to save your work.
How to upload media through the WYSIWYG text editor
Rather than uploading media items as you would content nodes, you can also upload media items directly in the "What You See Is What You Get" (WYSIWYG) text editor as you're editing a webpage.
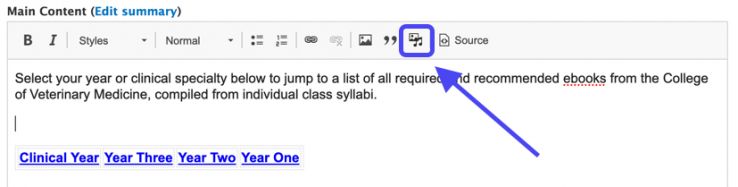
- In the top bar of the WYSIWYG text editor, select the Add Media icon. It looks like an image and musical note and is located directly to the right of the quotation marks icon. (The old Add Image icon, which looks like an image without a music note and is located directly to the left of the quotation marks icon, should not be used.)
- In the resulting popup, select the type of media you'd like to upload using the tabs at left. In this example, we're uploading an Image.
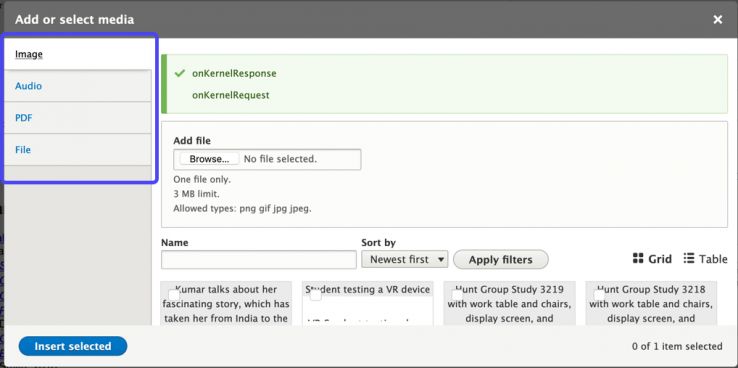
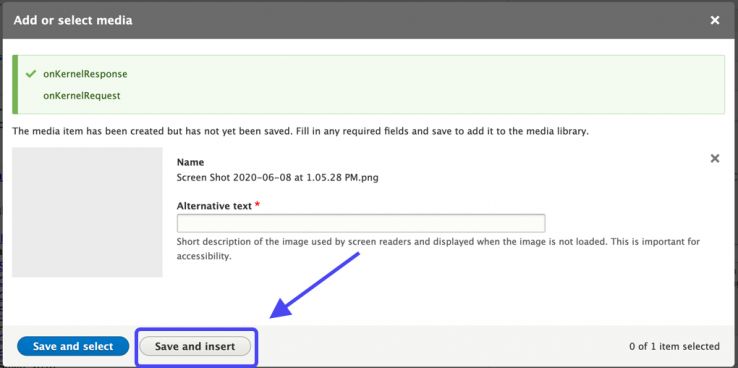
- Upload your file, and (if applicable) fill out alt text.
- Don't forget to select the grey Save and insert button to insert your media item into the webpage you're working on (if you select the Save and select button instead, you'll just have to affirm your choice again before the dialog closes).
Next: Embedding Videos
Updated