
Custom enclosure in the shape of a star to hold 3-D models
Custom enclosure in the shape of a star to hold 3-D models
Preservation is back with our first post in a series we are calling Elegant Enclosures! We want to share the process and solutions we come up with to house objects that are not suited for standard boxes. This is personally one of my favorite parts of the job. It requires a combination of creativity and precision to come up with a box that works on multiple levels for oddly shaped objects.
When creating a box, we want to satisfy several considerations at once:
Sometimes we don’t see the solution right away. It’s only after collaboration and iterations of initial ideas that we come up with the best solution. The middle of this process - when we can’t yet see our way out - can be frustrating. But when the lightbulb moment happens, it is pure elation!
This year, we had a prime example of this iteration process when we were tasked with making boxes for the Roy Gussow Models for Teaching Design.
“Gussow created the models in the 1960s for instruction purposes. He used them to teach the vocabulary of the components of 3-dimensions and prompt students to think about form. They demonstrate how an extended point becomes a line, an extended line becomes a plane, and an extended plane becomes a form. These models also were used to illustrate the variety of fluid and dynamic forms that can be constructed using a stable or static right angle.”

The challenge was laid before us. Some of these models were curved and rolled around, some would spin because they were not securely attached to their base, and some were mostly empty space.
We had a brainstorming session where we discussed how to group the items and initial ideas for supporting them. Once we decided which objects made sense to house together, we split up the work to make 6 boxes. Some of our first ideas worked out, while some needed tweaking along the way.
We started with the easiest: the rectangular models that could be held in the 4 walls of a box, or by creating a false bottom so the objects could nestle into custom-cut holes. We utilized our favorite box format with one wall that comes down when the lid is removed. This helps us achieve one of our goals of a box - easy accessibility to the object inside!

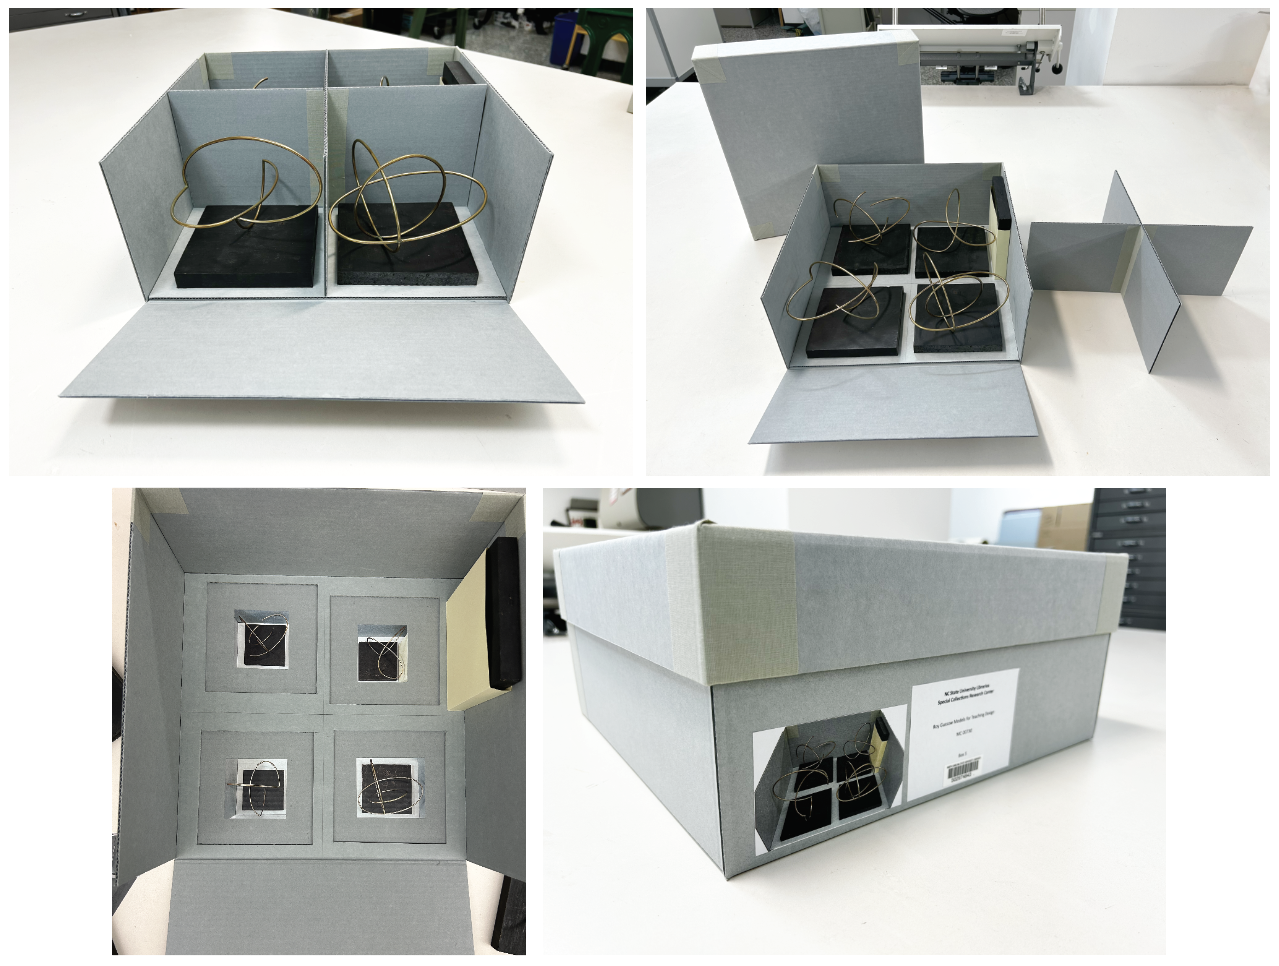
For the objects made of brass wire, each was unique and hung over its base in a different way, requiring the false bottom layer to be cut in a specific way. To help future users of the collection, we put pictures in the base to indicate where each item is to be housed, and in what orientation. We made removable walls to protect the models from bumping into each other and still allow for easy accessibility.
Next up we had to deal with some objects with a lot of negative space. It’s hard to build a box for empty space!

For one set we were able to make slits in the false bottom to hold the objects straight.
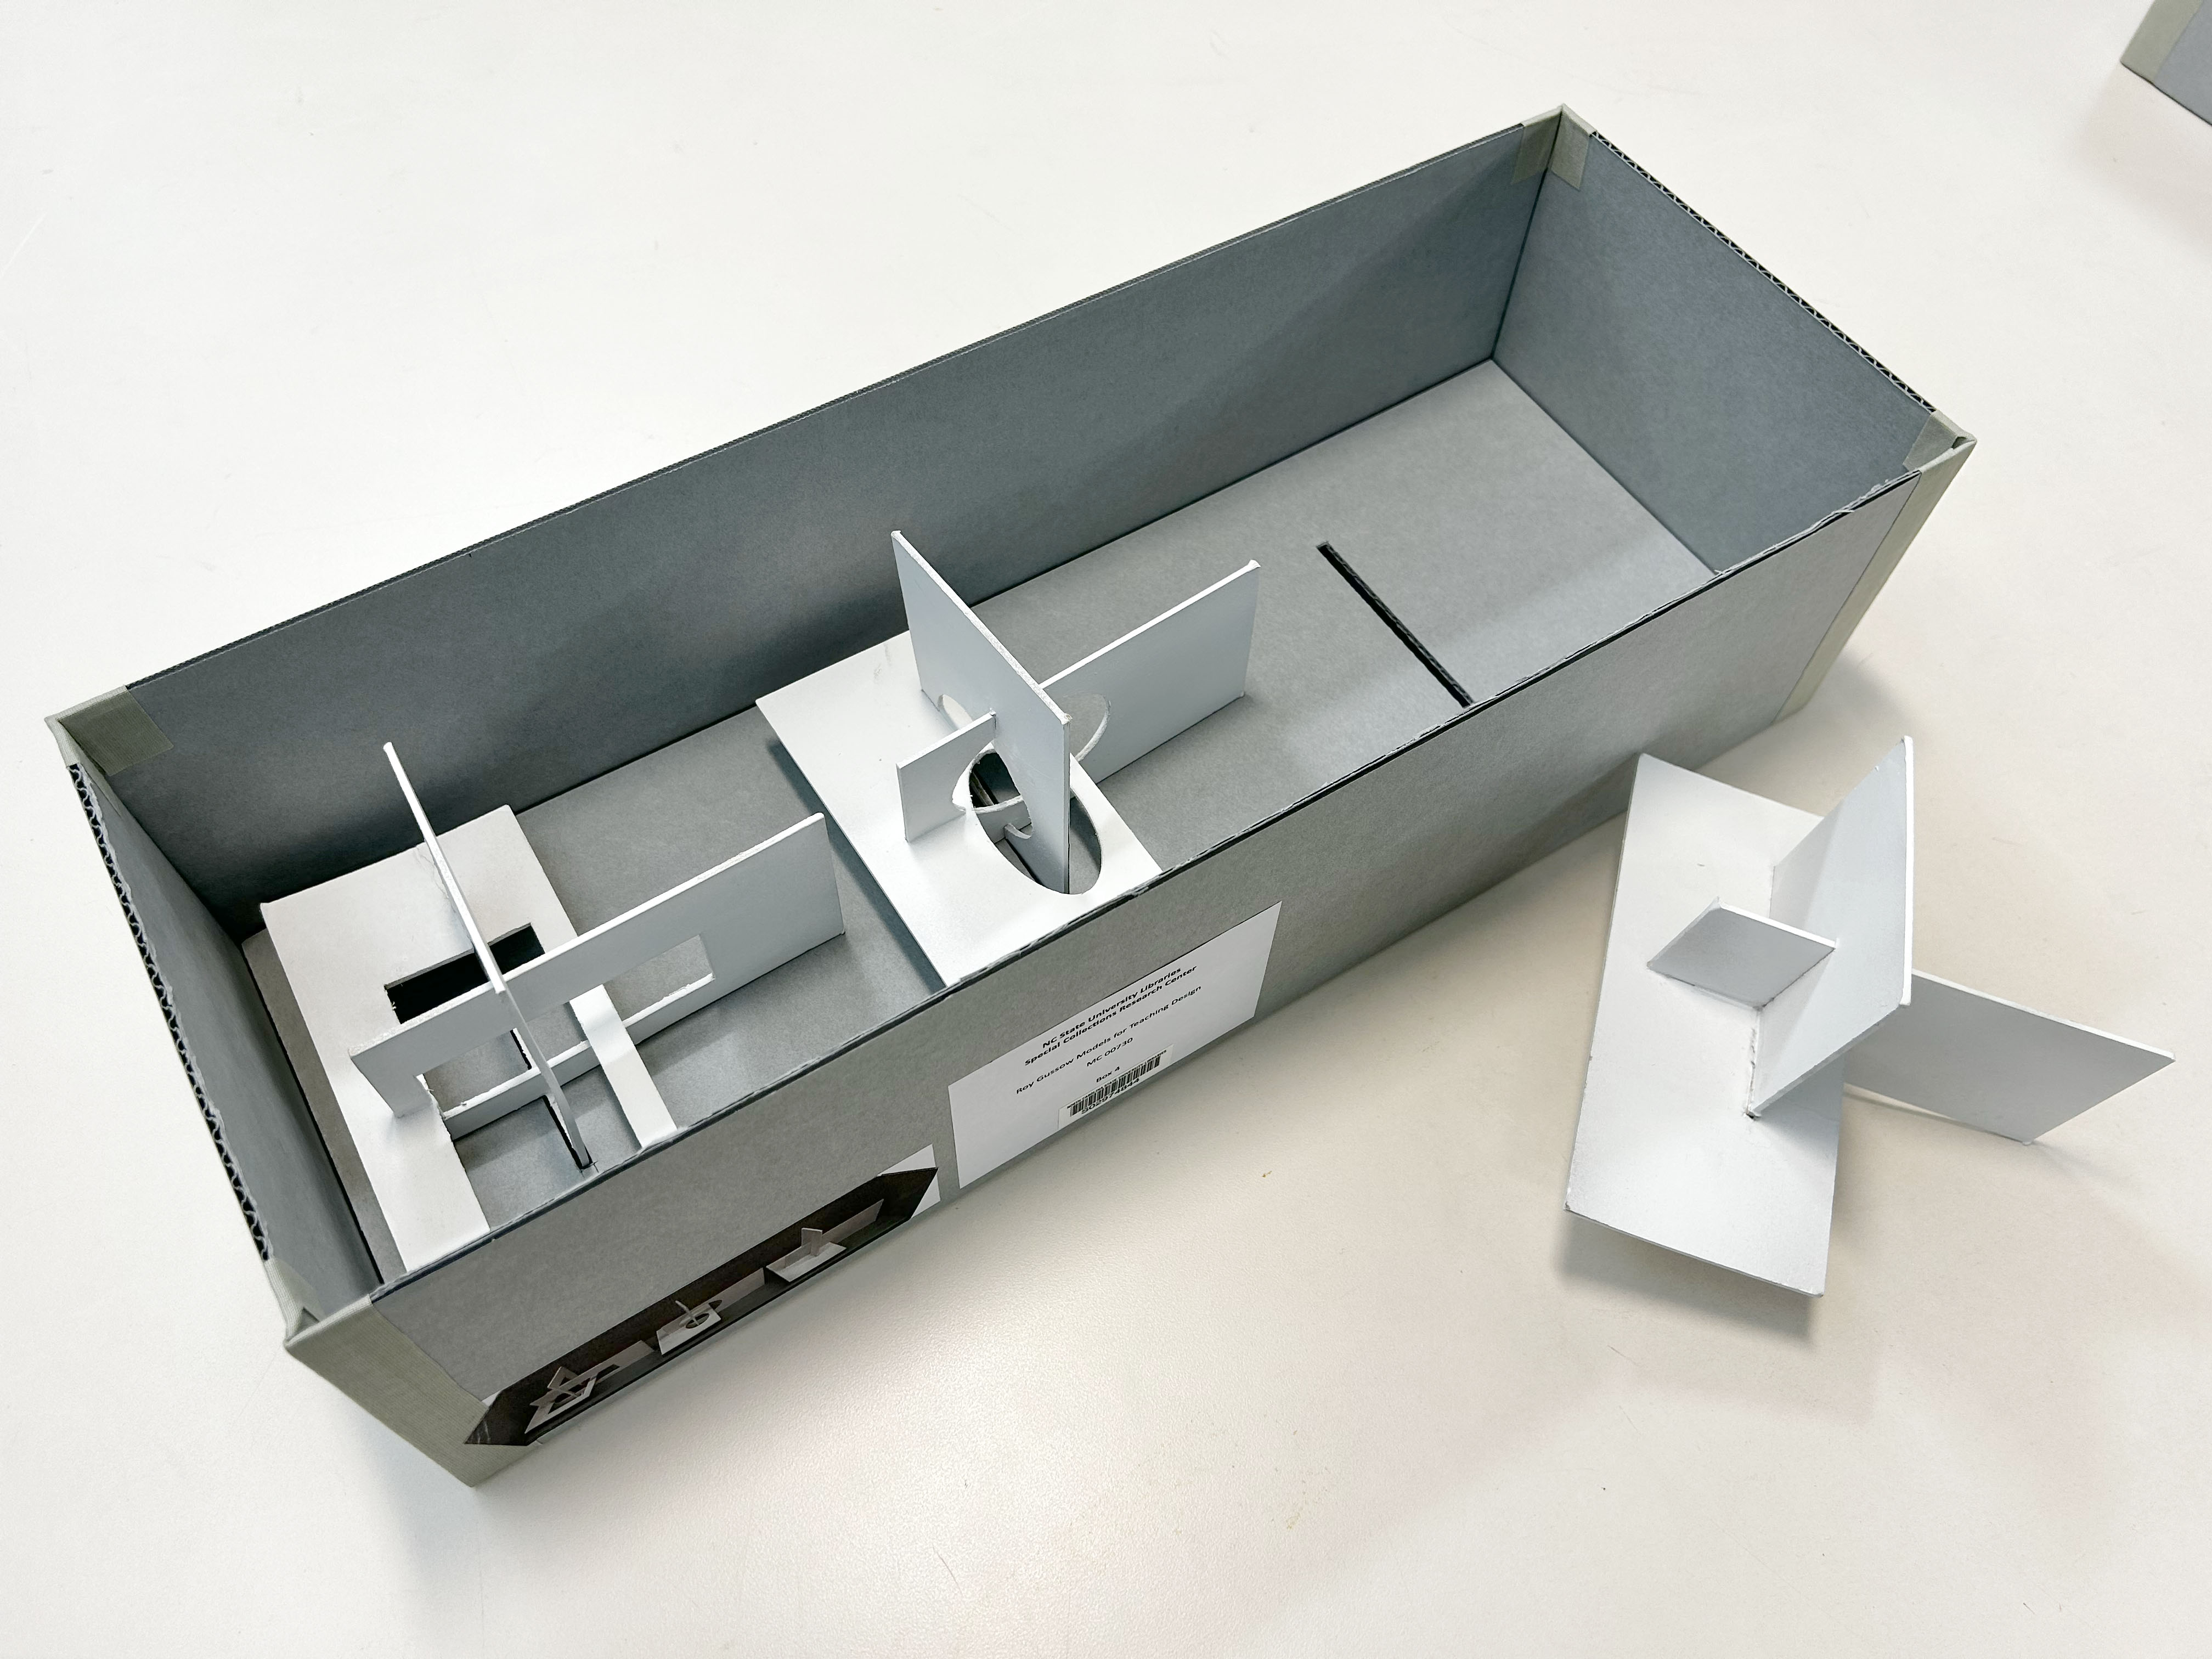
For another, the cross-shaped base was very shallow and wasn’t substantial enough to hold the object in place. We tried making a cross shaped space for them to sit in, but found that with any movement of the box, they bounced right out.

So we adapted and made smaller boxes within the larger box to hold them better. The third object was on a swivel, so we constructed some extra walls to keep it still.

At this point we were left with our biggest challenge. The remaining objects were curved, but held together at right angles. We put a one-of-a-kind object in its own small box in the center and looked for a way to arrange the 4 other objects around it. We tried to utilize the right angles by creating slots for them in the false bottom, which had worked for their rectangular counterparts. But because these were curved, they wouldn’t stay put! They were far too wobbly for our liking. Back to the drawing board!

We spent a good amount of time talking through options. Finally, after staring at them for a while, I asked the models what they wanted.
“How do you want to sit?” I asked.
And they told me. “We want to sit like a tripod and you keep trying to hold us up at right angles. It’s against our nature!”
With this insight, I reoriented the smaller box in the center and used its walls as anchors to make triangle enclosures so the models could sit as they wanted - in a tripod. And - BONUS - the enclosure turned out to be an interesting object in and of itself, worthy of Gussow, I hope. It feels like a real treat that our job of creating practical enclosures intersected with the conceptual ideas about 3-dimensional space that Gussow was teaching.

These are the moments we live for in Preservation: an elegant solution that meets all of our criteria - one that we couldn’t see from the beginning, but which revealed itself during the process. We have to stay open to new ideas along the way and pay attention to what the object needs so we can find the best solution. When that solution creates something beautiful itself - total win!
If you have any questions or are interested in viewing Special Collections materials, please contact us at library_specialcollections@ncsu.edu or submit a request online. The Special Collections Research Center is open by appointment only. Appointments are available Monday–Friday, 9am–6pm and Saturday, 1pm–5pm. Requests for a Saturday appointment must be received no later than Tuesday of the same week.
Opens in your default email client
URL copied to clipboard.